Tuesday, October 4, 2011

Hello I'm back!


Hello there! Those of you reading...I'm back after a hiatus. Things happen... life got in the way, so blogging took a back seat! Can't say I don't miss blogging though!

I leave you with some photos taken since the last time I was here. There are many more bakes which did not have the opportunity to pose for the camera...there just wasn't enough time for photo shoots! And then I thought I had misplaced my micro lens...but recently found it in my daughter's handbag!!

So I shall leave you with these - the macaron tower above was for a hantaran. A customer liked it so much that she asked me to replicate it for her Eid open house (below).


Macarons and more macarons...these photos are the decent ones. Most of the time I bake at night and the lighting is terrible, so I chose not to post them here hehe...

These ones below were taken in the afternoon. Natural light is always the best!


I received quite a lot of carrot cake orders for Eid..here are two of them...

And below, macarons photos taken in the evening. No amount of photoshopping will rectify the bad lighting! arrrghhh...


Till then... write you soon!

Monday, October 3, 2011

Baking with Dorie: Cream Puff Rings


Hello October! And hello to blog readers whom I've not written for, for what seemed like ages! I wouldn't have known this blog actually has a follower until I receive smses and emails asking me about my silence! Thanks for reading My Domestic Bliss!

This month it's my turn to host Baking with Dorie where a group of us bake a recipe chosen by the host from Dorie Greenspan's Baking from My Home to Yours. And I have chosen Peppermint Cream Puff Ring from page 290-292. But I ommitted the peppermint as I couldn't find any!

I also did not have sliced almonds on hand, so I used hundreds and thousands!

Here's my Cream Puff Ring with the recipe below. Also check out my fellow BWDs here!

Peppermint Cream Puff Ring
By Dorie Greenspan

For the Pastry
1/2 cup water
1/2 cup whole milk
1 stick unsalted butter, cut into 8 pieces
1 tbsp sugar
1/4 tsp salt
1 cup all-purpose flour
4 large eggs

For the Cream
About 1 1/3 cups heavy cream
40 fresh mint leaves
6 tbsp sugar
1/2 cup cold creme fraiche or sour cream
Peppermint extract (optional)

For the Glaze
2 oz bittersweet chocolate, chopped
1 tbsp heavy cream
2 tsp light corn syrup
3 tbsp sliced almonds, toasted

Getting ready:

Center a rack in the oven and preheat the oven to 425 degrees F. Draw a 7- to 8-inch circle on a piece of parchment paper, turn the paper over and use it to line a baking sheet. Fit a large pastry bag with a 3/4-inch diameter plain piping tip.

To make the pastry:

Bring the water, milk, butter, sugar and salt to a boil in a medium saucepan over medium-high heat. Add the flour all at once and mix it in with a a wooden spoon, then keep stirring energetically until the dough comes together in a shiny mass. The bottom of the pan will be covered with a thin film of flour. Cook the dough for another 1 to 2 minutes, stirring constantly, then transfer the hot dough to the bowl of a stand mixer or another large bowl.

Working with a stand mixer, preferably fitted with a paddle attachment, or with a hand mixer, beat in 3 of the eggs on at a time, beating until each is fully incorporated beore adding the next. Whisk the remaining egg in a small bowl and very gradually add enough of the beaten egg to form a dough that is thick, shiny and silky.

Spoon the warm dough into the pastry bag, position the tip above the outline of the circle and pipe a ring of dough about 1-inch thick. Pipe a second ring of dough inside the first ring and just touching it. Pipe a third ring of dough on top of the circle where the first and second rings of dough meet If you have any extra dough, pipe out as many cream puffs as you can or use the dough to make a few eclairs. (The cream puff dough must be piped out as soon as it is mixed. However, if you'd life, you can pipe out the ring and freeze it for up to 2 months beore baking it; don't defrost it, just add about 10 minutes to the baking time.)

Bake for 15 minutes. Reduce the oven temperature to 375 degrees F.

Bake the ring for another 20 to 25 minutes (total baking time is 35 to 40 minutes), or until it is puffed, brown and firm. Transfer the baking sheet to a rack and let the ring cool completely.

To make the cream:

Bring 1 1/3 cups cream and the mint leaves to a boil in a medium saucepan. Pull the pan from the heat, cover and let steep for 1 hour, then pour into a bowl and refrigerate until cold, about 3 hours.

Strain the cream into a measuring cup and add as much additional chilled cream as needed to measure 1 1/3 cups.

Use a serrated knife and a very gentle sawing motion to slice off the top of the pastry ring in one piece pull out and discard any soft dough from the inside of the base. Carefully place the pastry ring base on a platter.

Working with a stand mixer fitted with the whisk attachment or with a hand mixer in a medium bowl, whip the cream and 1/4 cup of the sugar until the cream holds firm peaks. Stir the remaining 2 tbsp of sugar into the creme fraiche and, using a rubber spatulat, gently fold the creme fraiche into the mint whipped cream. Taste the cream, and if you'd like a stronger mint flavor, add a drop or two of extract.

Spoon the mint cream into a clean pastry bag and pipe large rosettes into the base, keeping the rosettes close to one another. Pipe a second row of rosettes on top of the first row, piping the top rosettes between the bottom rosettes. Refrigerate the base while you make the glaze.

To make the glaze:

Melt the chocolate with the cream and corn syrup in a small heatproof bowl set over a saucepan of simmering water, stirring until the glaze is melted and smooth.

Using a small icing spatula, spread the glaze over the top circle of pastry. Sprinkle the toasted nuts over the glaze, and press them down gently. Carefully set the rign on top of the base - don't press down, you want to top to rest light on the whipped cream - and refrigerate the cake for at least 1 hour before serving. Covered lightly and kept away from food with strong odors, the ring can be refrigerated for up to 8 hours.)

Makes 12 servings

Sunday, August 14, 2011

Pure Magic at Pantry Magic Kuala Lumpur!


 Have I managed to get your attention yet? And oh... wipe that drool off your mouth now... haha!!

If you're like me, you'll be mesmerised at what's in store at Pantry Magic Kuala Lumpur, located in Jalan Telawi, Bangsar which opened its door just over 2 weeks ago. I am so so glad Pantry Magic is here in Kuala Lumpur! It is definitely a first of its kind here in town.

Entering the store, I didn't quite know where to start looking..everything looked so good and each utensil, each pot, each spatula was calling my name to give them some attention! It was as though I was lost in my fantasy world! Honestly, it was a bit embarrassing... I think my mouth was wide open gawking at the items in the store!

Thank God the ladies of Pantry Magic did not mind! Meet the three lovely ladies behind Pantry Magic Kuala Lumpur - sisters Farah and Tania, and their childhood friend Eisya. They were all so nice and welcoming and did not mind when I asked if I could take photos for this blog.


The trio at work - Eisya baking some cookies; they were for the customers! Farah behind the counter and Tania stacking  a set of colourful porcelain mixing bowls (which yours truly got a set for herself!)


Tania and Farah described themselves as passionate cooks whose project three years ago was to convert their childhood friend, Eisya into one! And that they did successfully!

The three of them then decided to share a business together, and after looking around, applied to be a Pantry Magic franchisee about a year ago.

Tania said, "We generally love cooking and meeting people and want to share our passion and spread the love!" Believe it or not, the trio uprooted themselves from Perlis to Kuala Lumpur to live out their dreams.

"If you want to be successful, you have to take risks and have to make sacrifices," said Tania.

Well, one thing is for sure - I really felt their genuine love for the art of cooking and baking at the store! I will let the pictures do the rest of the talking. Enjoy!

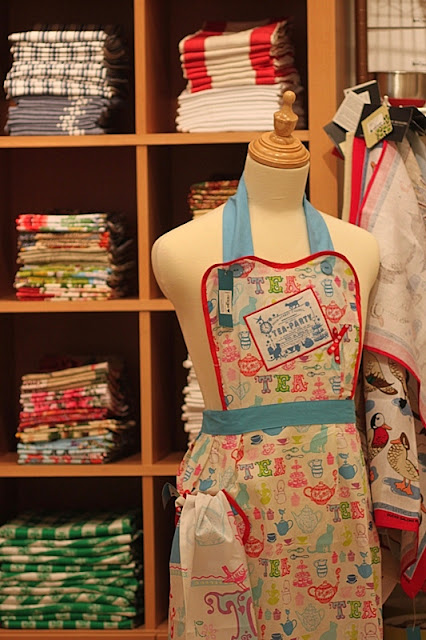
tea towels in various gorgeous designs


Wednesday, August 10, 2011

Red Velvet and Double Chocolate Macarons


I love the stark contrast of the bright red and white of these Red Relvet macarons. Don't you?

With just a hint of cocoa and deep red colouring for the shells, with luscious cream cheese filling, these red velvet macarons are a show-stopper!! Definitely not for the faint-hearted!


Below are some Double Chocolate macarons, a favourite among many (my fav too!)


Macs oh! macs... can't live with them, can't live without them! :D

Monday, August 8, 2011

Pavlova


I listed Pavlova as one of my to-do bakes for 2011 earlier this year, but I never got around to baking it... until I received an order from my favourite customer (ehem ehem tersedak tak you!) for a Pavlova for her hubby's birthday! I was excited but scared at the same time!

I did not have a recipe for Pavlova, so I went to my to-go site when looking for recipes or simply inspiration for bakes - Joy of Baking. It looked simply enough and I whipped it up while waiting for another customer to come collect her Red Velvet cake.

Click here for the recipe.


The recipe says to spread the meringue on the baking paper, but I knew mine was going to be a mess if I did that... so I cut a huge hole in my plastic piping bag and piped the meringue around the earlier drawn circle. I filled up the circle with the remainder of the meringue and tidied it with more piped meringue... they looked like clouds in my dreams!

photo below of the piped meringue before it went in the oven...


After about 70 minutes in the oven, it was done... but I kept it in the oven with the door ajar until it was ready to be garnished a few hours later.

Below is the final product, with dollops of whipped cream and fresh strawberries and kiwis. Thanks for the order, Soraya!

Wednesday, August 3, 2011

Baking with Dorie: Crème Brûlée


Crème Brûlée is French, and any French dessert must be good, oui?

These are absolument renversant - absolutely amazing!


Cream, milk, sugar, vanilla and egg yolk makes one creamy and satisfying dessert!

This month's Baking with Dorie bake was chosen by BWD founder Grapefruit. Take a peek at her beautiful Crème Brûlée, recipe included here.

For me personally, Crème Brûlée is an icon for desserts! It's been on my to-do list for ages and I'm glad Grapefruit chose this recipe for BWD.

I wish I had a blow torch to play around with, but I didn't - so I used my broiler to caramelise the sugar. I didn't get a thick layer of burnt sugar but the crunch was there!

I wish I took better photos, but these were shot at 5am this morning and I don't have good lighting in the house! Can't wait to have some for iftar later!

Monday, August 1, 2011

Say...Korova!!


Kueh Raya? Heheheh... we've only been fasting for a day and here I am presenting you with an Eid cookie nominee!!

I love these cookies, or more aptly, sables. They have a deep chocolatey flavour and sandy in texture. I make them all year round - kids absolutely adore them and I dare you to stop at just one!


As in the previous year, I am taking (small) orders for this cookies, but I think your family will appreciate it more if you make them yourself to bawak balik kampung! Go here for the recipe. They are also known as World Peace Cookies - I wrote about them here.


So, what are you waiting for? Go make some today!

Thursday, July 28, 2011

This and that...


Been doing a lot of French meringue macarons lately. The thing about my French mac; they are always grainy! I wish they aren't but those who are prefer them don't mind at all. The yellow, chocolate and hazelnut macs were a birthday gift!

And then there's Red Velvet again! Two RVs were ordered, referred to me by Kitchen Guardian - thanks, Yani! Two of the same three-layer RVs to indulge in for an office party.


Yes, I'm in love with French meringue macarons again! And I love it when the bottom doesn't stick to the baking paper! Makes life so much easier!


And below is to me one of the best tasting cakes that I bake - Boston Cream Pie - sponge cake with French pastry cream and chocolate ganache (yes, it's a cake with an identity crisis!) Thanks Soraya for ordering this and thanks for your understanding - the cake layers moved out of its place! I'm glad you think its yummy nevertheless... I sakit perot already ya know!! Next time no more three layers...just two!


 And more French macarons...


I'm so glad it's Friday tomorrow! Enjoy your weekend y'all!

Saturday, July 16, 2011

Untitled


Yes, untitled. Well, actually this blog post has a title. It's titled 'Untitled'. Hmmm...I think I really have no more creative juice left in me whatsoever..not a single drop! But blog I must coz I have pictures to show and stories to share!

By the way, the photo above is actually of my macaron shells rejects! They did not make the cut - either too small, no same-coloured pair, total lop-sided on one side (redundant?) or burned at the bottom. I was arranging them in the 'rejects' container and thought they actually look good together!

And below are those which made the cut... and as usual, they are not quite perfect either! :-)


Well, in the quest of macaron perfection, I purchased these Mastrad macaron baking sheets below from Bisous À Toi via Kitchen Guardian. Oh! how I dreamed of perfect looking, same-sized macarons!! All my macaron worries would be over, I told myself...when I get my hands on these babies! Then reality checked in and I knew that macaronnage is the most important thing in macaron-making... still I wanted these! And so on Wednesday night I went to collect these from my mac buddy, the Kitchen Guardian (more than the guardian of her kitchen, she is the epitome of a superwoman to me!) Read her post on this here.


What do you know, my macarons stuck to the silicone sheets and I had the shortest feet ever! I am not blaming the sheets, though...I just need to get used to using silicone sheets. I don't own any Silpat, the non-stick baking mat and have always relied on the trusty Tesco brand baking paper. Mastrad oh Mastrad... I hope it won't be a long and stressful relationship between the two of us! He he!! But despaired I am not!

left; the piped mac batter. right; baked macarons...short feet and their bottoms stuck to the sheets!

Well, not only was I excited to collect my Mastrads from KG the other night, I was also looking forward to these... the KitchenCraft kitchen thermometer which KG so kindly bought for me as a gift and...


...this Jill Colonna book, Mad about Macarons!! Aaaah...I can't put the book down..so many recipes, so many photos to drool over!! Thank you Yani!! XOXO!!


And oh boy! am I excited about finishing up my MAD bakes...two more weeks and I'm free as a bird!! That ought to give me back my creative juices!! :P Enjoy the rest of your weekend!

Tuesday, July 5, 2011

Wedding Cupcakes for the lovely Nadia...


I am a lover of weddings! Aren't you?

The sweetest bride-to-be Nadia ordered some vanilla and coconut cupcakes to compliment her wedding cake which was to be baked by her mom! Isn't that just so sweet? Nadia is such an unfussy bride...so unlike me when I was one!! LOL...she was open to all suggestions but in the end I followed her order to the tee and we're both glad I did!!


Don't you think the Victoria Sandwich Cake by Nadia's mom look splendid? I love the entire look of free and easy, no-fuss backyard garden wedding. And the little ladies ogling the cake table are too cute!

By the way, Nadia was kind enough to send me a thank you email for the cupcakes and included the photo above taken by her friend!

Here's wishing the newlyweds a blessed and blissful marriage!