Friday, April 29, 2011

Traditional Madeleines


This is one of the French pastries that I've been wanting to make. They're really simple to prepare, yet has strong characteristic; thanks to their distinct scallop shape. They are also quite similar in look and in taste to a traditional Malay little cakes called bahulu. Thus, I dub these bahulu Peranchis, or the French bahulu. I won't get sued, will I?


I think they are as pretty as their name! Named after a local woman in Commercy, France, read about the history of Madeleines here.

They are also really tender and light little cakes and personally, I think best to be eaten with a cup of tea. I think coffee would just kill the sweet, fragrant mild taste of the lemon zest in them.


I just recently got myself the mould from a famous baking supplies shop here in Kuala Lumpur. The shocking purplish pink silicone mould has been irresistable to me since the first time I saw them sometime back, yet at the same time I had reservations about getting them. I must add that they are inexpensive and of course, it has been known that sometimes inexpensive tools can affect the quality of your bakes, but these really serve their purpose and I can't be happier! Come to think of it, I don't own any expensive kitchen tools. NONE! Of course, I would love to get a better Madeleines mould - a French one would be great; one which has a more pronounced scallop shape. But for now, I'm happy with what I have! :)


I used Dorie's recipe for this and here they are:

Traditional Madeleines

adapted from Dorie Greenspan, Baking: From My Home to Yours

2/3 cup all-purpose flour
¾ teaspoon baking powder
Pinch of salt
½ cup sugar
Grated zest of 1 lemon
2 large eggs, at room temperature
2 teaspoons pure vanilla extract
¾ stick (6 tablespoons) unsalted butter, melted and cooled

Confectioners’ sugar, for dusting

Whisk together the flour, baking powder and salt.

Working in a mixer bowl, or in a large bowl, rub the sugar and lemon zest together with your fingertips. Add the eggs. Beat the eggs and sugar together until pale, thick and light. Beat in the vanilla. Gently fold in the dry ingredients, followed by the melted butter. Press a piece of plastic wrap against the surface of the batter and refrigerate it for at least 3 hours.
Preheat the oven to 400 degrees F. Butter and flour12 full-size madeleine molds.
Spoon the batter into the molds. Bake for 11 to 13 minute. Just before serving, dust the madeleines with confectioners’ sugar.

Thursday, April 28, 2011

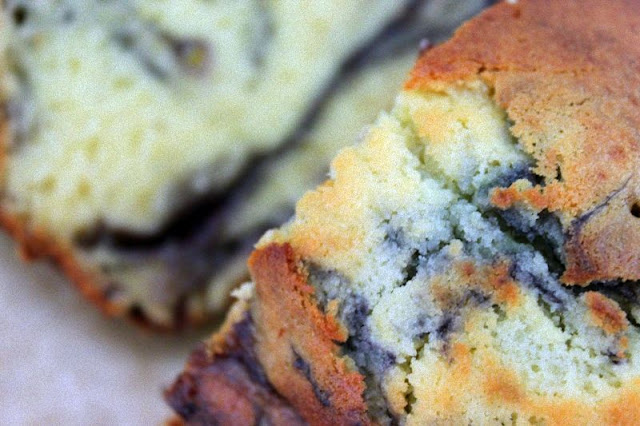
Lemon Blueberry Bread ~ Happy Friday!


I can't believe its gonna be Friday in a few minutes. For some reason, I wish it wasn't as there are still so many things to be completed at work this week! OMG, was that me talking? LOL!!

It's been a stressful week, and in times of duress, people can get very very edgy! How ironic that in busy times like these, there are bound to be people who can't do anything else but try their very hard to hit on your nerves! aaahhhh...the occupational hazard of any working person.

So what do I do when dealing with stress? I bake!! This will be for my dear colleagues who have been working hard day and night tirelessly for the last few weeks. I hope they will enjoy this for breakfast or a snack... when they actually find time for a break!


This recipe is from Joy of Baking , a simple one but nonetheless uses my favourite ingredients in a cake - lemon and blueberry.And I love dessert that disguises itself as breakfast food! The smell of something with lemon baking in the kitchen is just heavenly. Sweetly fragrant! And you know what? I actually ran out of sugar! But I had plenty of brown sugar, so that's what I used - and I lessen it by 20g.

Have a great weekend ahead and here's the recipe!

Lemon Blueberry Bread

1 1/2 cups (195 grams) all-purpose flour
1 teaspoon baking powder
1/4 teaspoon salt
6 tablespoons (85 grams) unsalted butter, room temperature
3/4 cup (150 grams) granulated white sugar
2 large eggs
1/2 teaspoon pure vanilla extract
1 tablespoon grated lemon zest (outer yellow skin of the lemon)
1/2 cup (120 ml) milk
1 cup fresh blueberries

Lemon Glaze: (I did without)
1/4 cup (50 grams) granulated white sugar
2 tablespoons fresh lemon juice

for how-to, go here.

Tuesday, April 26, 2011

Matrimonial Macarons


In Malay culture, asking for a woman's hand in marriage is not the job of the man, but his family's! In fact, the man's family will ask for the woman's hand in marriage through her family too! Of course in this day and age, this custom called merisik acts only as a ritual, serving as a pre-event to the actual wedding, as arranged marriages are pretty much unheard of.

The merisik is then followed by an engagement ceremony called bertunang, and lastly the holy matrimony called nikah where the couple are married off in accordance to religious observance.

During merisik, the man's family will bring with them a tepak sirih , a betel leaf container and some gifts consisting of sweet treats or fruits, usually in an odd number.

So, where am I leading to? Well, last Sunday I was a member of the merisik party for my nephew, who is planning to tie the knot in November. This mini macaron tower was what I contributed as one of the gifts. Chocolate and almond macarons with strawberries and tiny daisies to go along.


And I am submitting this part-chocolate macaron tower to April's MacTweets! This month's MacTweets is all about chocolates! I used my favourite chocolate macaron recipe by David Lebovitz and filled it up with bittersweet chocolate ganache. Chocolatey indeed!


Also some more macarons for matrimony... a colleague tied the know last weekend and requested cream and pink macarons as gifts for the groom, known as hantaran during her nikah ceremony.


They were filled with peanut butter and raspberry jam. Yumms!

Saturday, April 23, 2011

Tandoori Shrimp and Chicken with Mint Sauce


Tandoori is a firm favourite at home. I usually make chicken tandoori, but this morning the shrimp caught my attention at the grocery store - since I'm making the paste for chicken tandoori, I thought why not add in some shrimp as well!


The truth is, it's been awhile since I baked some tandoori at home and my eldest who can eat tandoori everyday (no kidding!) was asking me two evenings ago if I was going to make some soon! So what's a mom to do? Bake some tandoori, of course!


And so it was a carbo-free lunch this afternoon - I did not get any naan bread to go along with the meat and the kids did not mind. The tandoori fan had four pieces!

I made mint sauce to go along with it - I added some yogurt to the original recipe and it was perfect. Honestly, I can have spoonfuls of the sauce on its own! Here, I diced some cucumber and tomatoes and used the mint sauce as dressing.

The tandoori chicken recipe was taken from a famous Malaysian food blogger site, Mat Gebu. I have translated the recipe into English below:

Chicken Tandoori

Ingredient A
500 grams chicken pieces
3 tablespoons fresh lemon juice
1 1/2 teaspoon salt
1/4 teaspoon tumeric powder

Ingredient B
1/2 cup plain yogurt
1 1/4 teaspoon coriander powder
1/4 teaspoon cumin powder
1/2 teaspoon paprika
red colouring (optional)

Ingredient C
1 inch ginger
3 cloves garlic
1 red chillie

1/2 tablespoon cooking oil
slices of lime

Method:

In a large bowl, add lemon juice, salt and tumeric powder to chicken pieces. Marinate for 15 minutes.

Meanwhile pound Ingredient C with mortar and pestle and add them to a bowl filled with Ingredient B. Mix B and C together. Add B and C mixture to the bowl of chicken and marinate further for 30 minutes.

Put them on the oven grill and brush some cooking oil. Bake at 200C until done.

Serve with lime slices.

Mint Sauce

1 cup packed fresh mint leaves (250ml
1 shallot finely chopped
1 small fresh red Thai Chile,coarsely chopped,seeded (1 to 1 ½ teaspoons) (5to7ml)
1 large garlic clove, chopped
¼ cup fresh lime juice (60ml)
2 tablespoons water (30ml)
2 teaspoons sugar (10ml)
¾ teaspoon ground cumin (4ml)
¾ teaspoon salt (4ml)

Strip mint from stem and add to blender with chopped shallots, garlic, chili, sugar, water, cumin, salt and squeeze in lime juice. Blend and pour into a bowl for dipping.

is best eaten the day it is made (the colour will turn overnight). Keep chilled, covered.

Makes about ½ cup (125ml)

Tuesday, April 12, 2011

Milk Chocolate Chunk Muffins


I love recipe books and I'm lucky I have friends who love buying them for me!

This is from one of the recipe books given to me by my BFF some time ago (I lost track!). It's a delicious book, with all things chocolate, aptly titled CHOCOLATE by Donna Hay.


To be honest with you, I have not been baking much from other books apart from Baking From My Home To Yours by Dorie Greenspan. I am biased, I know. I just can't help it! Almost all of the recipes from her book that I have baked from have proved themselves to be keepers, so naturally I gravitate towards her book when wanting to try a new bake.

Then last night my daughter asked me to bake some chocolate cupcakes to take to school - my favourite chocolate cake recipe involved taking out the mixer to cream the butter and the sugar and I ain't got neither the time nor the energy to do that last night, so I took out Donna's book to look for a recipe which uses oil - which means no mixer is involved, simply whisk everything up together.

This caught my eye... prepared in 15 minutes and baked in 20. Done in 45 minutes!! My kind of recipe, definitely.


I baked them in mini paper liners and the recipe yielded 30 cupcakes - enough for my daughters to share with their friends. Ran out of liners and the leftover batter fit nicely into two ramekins. I had them for breakfast - they are mildly sweet and the milk chocolate chunks added a fun factor. I'm not too sure they're my favourite chocolate cupcake recipe though! But here's the recipe if you want to try it for yourself!

    Milk Chocolate Chunk Muffins
adapted from Donna Hay ~ Simple Essentials: Chocolate


Ingredients
2 cups flour, sifted
1/3 cup cocoa powder, sifted
1 teaspoon baking powder
1 cup cater sugar
2 eggs
1 teaspoon vanilla extract
2/3 cup vegetable oil
1/2 cup milk
1 cup chopped milk chocolate

Preheat oven to 180C (350F). place dry ingredients in bowl and combine. In separate bowl, combine eggs, vanilla, oil and milk and whisk together. Stir liquid mixture into dry ingredients and mix just until combined. Fold in chocolate. Spoon into muffin pan lined with paper cups. Bake for 20-25 mins.

Monday, April 11, 2011

Baking with Dorie: Bill's (not-so) Big Carrot Cake!


My two-layer cake may not be as big and tall as Bill's, but I bet you they taste just as good!! And for that, thanks to Dorie's friend, the late jeweler Bill Bartholomew.


And because Bill's cake look so HUGE in the photo, I opted to make half a recipe. Or so I planned. I measured everything in half - sifted the dry ingredients, chopped the walnuts, grated the carrots bla bla bla. Put 3/4 cups of sugar into a big bowl (a half recipe would require 1 cup, but I decided to reduce the sugar further) and then poured the canola oil in. Oooooopppppssss... instead of half a cup for half the recipe, I poured a full cup for a full recipe!! and I really didn't realise the mistake I made in measuring the oil until I became suspicious of the runny oil and sugar mixture. I'm just so glad I realised that before adding the other ingredients! I tell you, this has happened to me a few times before!


The plan was to make half the recipe into cupcakes to bring along when I visit my BFF who had a son last week. But I am SO glad I had to make a full recipe because the carrot CAKE and the carrot CUPCAKES tasted somewhat different! Same recipe, but the texture is more pronounced and much better enjoyed as a slice of cake! Mine was very nutty - I omitted raisins and doubled the amount of walnuts.

I sooped out 24 minis and used the rest of the batter to make two 7-inch cakes. I also reduced the amount of icing sugar in the cream cheese frosting by half - they were already very sweet! I gave some of the cupcakes to my two neighbours and took the cake to BFF's.


This cake is sooo sooo good!! Thanks to Rebecca of Beurrista for choosing the recipe this week for BWD. Check out the rest of my fellow BWD'ers entry this week here. After all this time, I'm still so in love with my Baking From My Home To Yours!

Friday, April 8, 2011

A Macaron Croquembouche for a birthday surprise!


I just love a creative challenge! When there are none, I create one for myself! And so I was thrilled when a friend asked me to make a macaran tower or a croquembouche for her client 's birthday and delivered as a surprise to her office.

This is my second macaron tower - made the first for my mom's 70th birthday last December - had always meantto blog it..maybe I will someday, hopefully before her next birthday!


I always think less is more, so this was really a simple design - I think the sweetest thing about the croquembouche have to be the pretty flowers!

Monday, April 4, 2011

Macs and a new toy = a self-confessed, self-indulgent post!

After drooling for quite sometime now looking at photos taken with DSLRs, I finally got myself one last Friday!

Yup, been taking my bake photos using a low-end Canon point and shoot - up until last December when my screen went berserk on me and I've since then been borrowing my 12-year old daughter's Canon PowerShot! Not anymore! :P

And among my first subjects were my favourite confectionery at the moment - sweet macarons!

I had quite a bit of macarons order over the weekend and true to the title of this post, here are some photos of my macs taken with my new toy - totally self-indulgent, totally loving it! If you're still reading this, bear with me, will ya!

 Matcha macarons, straight out of the oven!


Macarons in assorted colors - pink ones are flavored with rose; yellow ones to be filled with lemon cream; peach ones to be filled with orange cream, tan-colored macs are coconut filled and purple ones with peanut butter and raspberry preserve...


Delphinium blue macs to be filled with blueberries!


I'm loving it!